https://github.com/norcholly/safe-pi-monitor
1. PROJECT OVERVIEW
This project aims to collect environmental data (such as temperature, pressure, and humidity) through the Sense HAT sensor module via Raspberry Pi, store this data in a MariaDB database, and visualize it through a PHP-based web interface. The system is capable of generating graphs from hourly daily data using Python, providing an infrastructure for meaningful data analysis in fields such as environment and health. In addition, an HIDS is in place to monitor network traffic against brute force and DDoS attacks, and an iptables firewall is used to block the attacker’s IP address based on alerts from the IDS.
2. Technologies Used
Hardware
- Raspberry Pi OS on VirtualBox: The core hardware for processing, storing, and transmitting data.
- Sense HAT Sensor Module Emulator: Used for collecting environmental data (temperature, pressure, humidity).
SOFTWARE and Programming Languages
- MariaDB: SQL database used for securely storing data.
- PHP: For developing the web-based user interface and visualizing the data from the database.
- Bash Script: Automates the download, installation, and basic configuration tasks.
- Python: Used for collecting and processing sensor data, as well as creating graphs.
- Graph Libraries: Python’s Matplotlib (used for creating graphs).
- Suricata (HIDS) and iptables (Firewall): For monitoring network traffic flow and blocking suspicious traffic.
3. System Architecture and Design
System Flow
- Data Collection: Temperature, pressure, and humidity data are retrieved from the Sense HAT Emulator using a Python script.
- Data Storage: Collected data is stored in the MariaDB database configured and downloaded via Bash script.
- Data Visualization: Data is presented to the user in real-time as graphs and tables via a PHP-based web interface.
Data Flow Diagram
Sensor -> Python (Data Processing) -> MariaDB (Database) -> PHP -> Web Interface (Visualization)
4. Project Steps
4.1 Setting Up the Virtual Environment
- A virtualizer (such as VirtualBox, VMWare, etc.) is used to install Raspberry Pi OS.
4.2 Collecting Sensor Data
- A Python script is written to read temperature, humidity, and pressure data from the Sense HAT sensor.
- The collected data is tested in the terminal using Python.
4.3 Storing Data in the Database
- MariaDB is downloaded, installed, and configured via Bash script.
- A database schema is created to store sensor data.
- Python is used to save data into the database.
4.4 Developing the Web Interface
- PHP is used to read data from the database and display it in table format on the web interface.
4.5 Creating Graphs and Data Analysis
- Graphs are created using Python’s Matplotlib from the daily hourly averages of data.
- The graphs are presented both on the web interface and in exportable formats.
4.6 Installing the Security System
- The system is secured against brute-force and DDoS attacks using Suricata and iptables.
5. Installation and Setup
Let’s perform the necessary installations for our system to function properly.
5.1 VirtualBox Installation
First, to work with the virtual Raspberry Pi operating system, we need a virtualization tool. I used VirtualBox, and now let’s download and install the appropriate version of VirtualBox for our operating system from the following link: https://www.virtualbox.org/wiki/Downloads.

5.2 RASPBERRY PI DESKTOP INSTALLATION
Now that our VirtualBox virtualization tool is ready, let’s download and install the Raspberry Pi Desktop virtual machine from https://www.raspberrypi.com/software/raspberry-pi-desktop/, and set up our operating system.
5.3 Database Installation
Now that our Raspberry Pi Desktop is ready, let’s install the MariaDB database so that the data we will collect soon with Python and SenseHat can be saved to the database. First, open the terminal on our system, type apt update, and perform the updates. Then, type sudo su to switch to the root user, and after that, run git clone https://github.com/norcholly/safe-pi-monitor to download the project files. Once we make the /scripts/bash/database-setup.sh file executable, we run it, and our database is successfully installed.

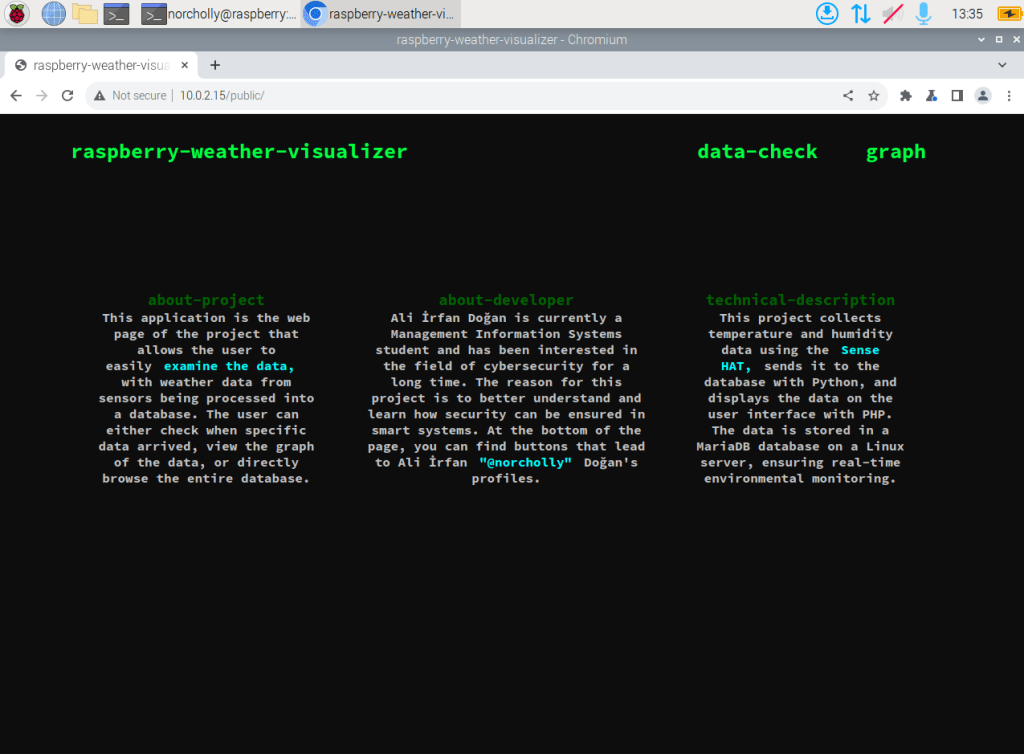
5.4 WEB INTERFACE INSTALLATION
After setting up our database, we need a web interface designed with PHP code to view this data. To do this, we install the Apache2 service and the necessary PHP extensions on our Raspberry Pi by typing apt install apache2 php libapache2-mod-php -y. Then, we transfer the two folders, public and src, from the project files into the /var/www/html directory after deleting the existing index.html file. Finally, we write ifconfig in the terminal to find our local IP address, and then add it to the bind-address section in the MariaDB configuration file, which we open using the command nano /etc/mysql/mariadb.conf.d/50-server.cnf. Afterward, we restart the web service by typing systemctl restart apache2 in the terminal, and we open the browser and enter our local IP address to view our web interface.
5.5 Setting Up the Data Collection, Transfer, and Graphing System
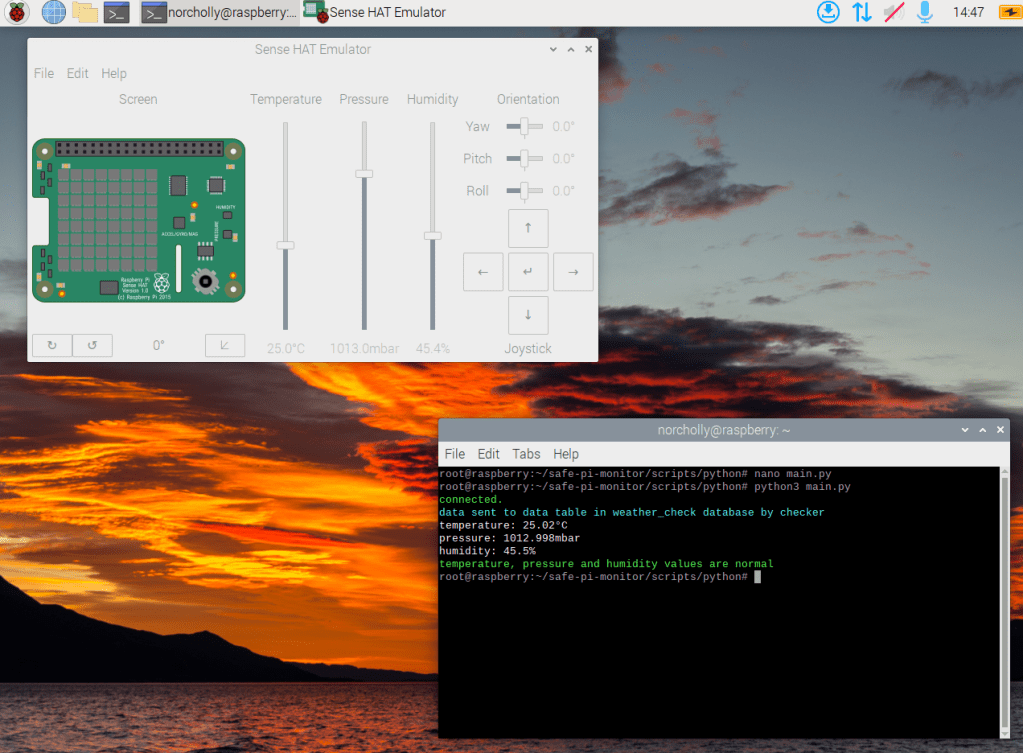
After making the install.sh file in the /scripts/python directory that we downloaded from GitHub executable and running it, the necessary Python libraries will be installed. You need to open the main.py file using the command nano main.py and enter your database information (This is also required for the graph.py file!). Then, click on the Raspberry symbol at the top left and open the Sense HAT emulator from the Programming section in the menu. Now, when we run python3 main.py, the data from the Sense HAT will be saved to the MariaDB database and will be easily viewable in the web interface.
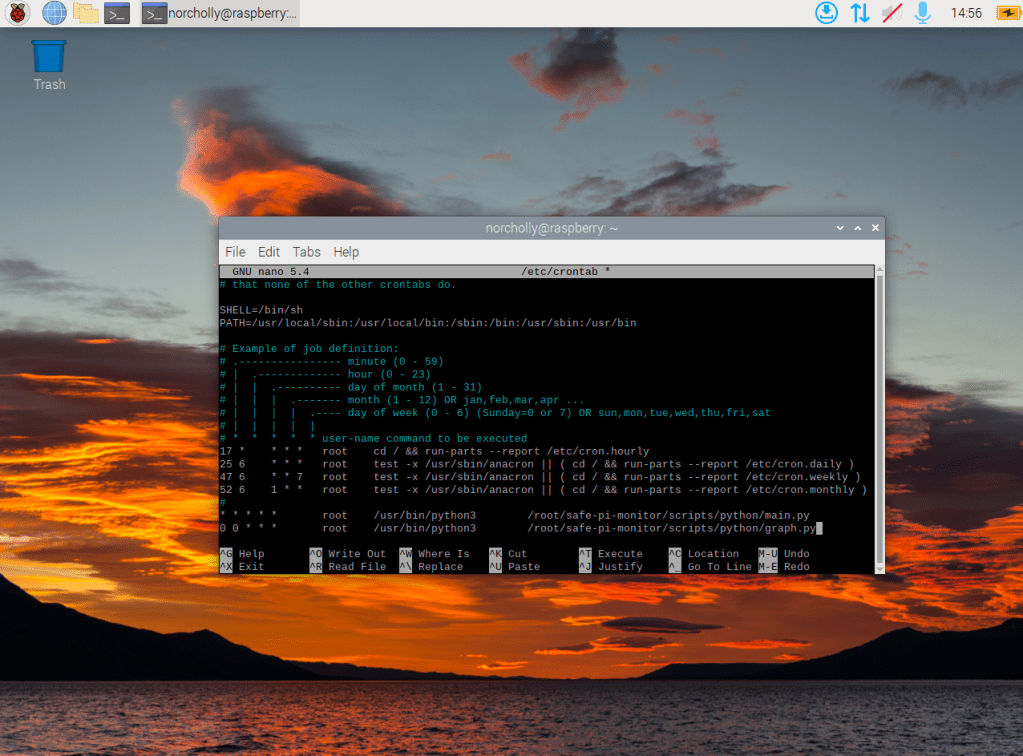
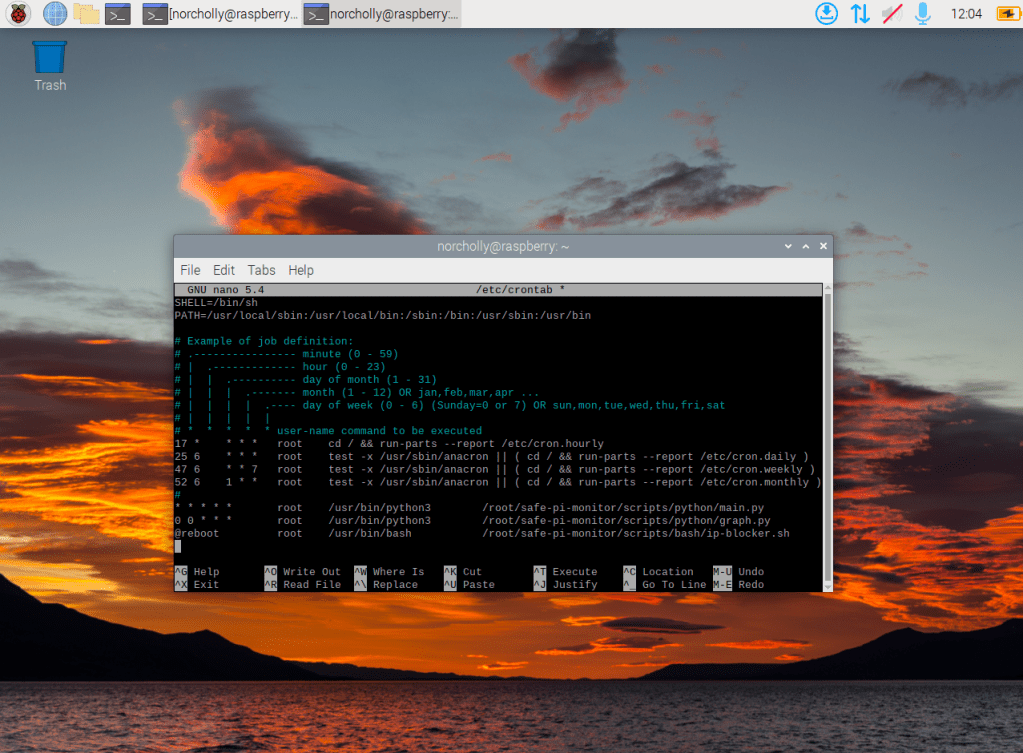
To automate the process of saving the data from the Sense HAT to the database, let’s open the cron jobs by typing nano /etc/crontab. Write the lines below according to the path of your project folder. Then, type systemctl restart cron. This way, the Python code will run automatically without any manual intervention.
5.6 HIDS/HIPS Installation
After making the /scripts/bash/ids-setup.sh script that comes with our project files executable and running it, we move our custom rule file by typing mv /safe-pi-monitor/local.rules . in the /etc/suricata/rules folder, where we set up our IDS system. Then, open the Suricata configuration file by typing nano /etc/suricata/suricata.yaml, and update the HOME_NET variable with our local IP address, which we find by running the ifconfig command.

To activate the rule file (local.rules) we moved, we modify the rule-files section in the configuration file where we are currently located.

After saving the configuration file, we type suricata-update in the terminal and then systemctl restart suricata. We open the /scripts/bash/ip-blocker.sh file in our project files and enter our local IP address where required. Then, we open the cron job configuration file with the command nano /etc/crontab and save it to run ip-blocker.sh once each time the machine starts.
Finally, we restart our machine and type suricata -c /etc/suricata/suricata.yaml -i <interface> in the terminal to start our IDS system. Now, our device is secure against brute-force and DDoS attacks.
6. Conclusion
This project is a system developed for the collection, processing, and visualization of environmental data using Raspberry Pi. Temperature, humidity, and pressure data are collected using the Sense HAT sensor module. These data are processed using Python and stored in a MariaDB database. A PHP-based web interface is used for visualizing the data. The web interface provides a user-friendly view of the data, presenting it as graphs and tables. Furthermore, the security of the system is ensured with the use of Suricata HIDS (Host-based Intrusion Detection System) and iptables firewall to block potential DDoS and brute-force attacks. Cron jobs and the ip-blocker script integration have been implemented to ensure the system operates automatically.


Yorum bırakın